The food industry is undergoing a rapid transformation. As more customers turn to mobile ordering and online food delivery, restaurants that embrace digital platforms are thriving. Gustosfera makes it incredibly simple for restaurants to enter the digital space — without needing technical expertise or a large investment.
In this article, we walk you through the complete process of setting up your restaurant on Gustosfera. From registering your account to managing your menu and launching your mobile app, this guide will help you get started with confidence.
Step 1: Download the Admin App and Register
The first step is downloading the Gustosfera Admin App, which is available on the official Gustosfera website “https://gustosfera.com” or the Samsung Galaxy Store.
Once installed, begin your registration by providing a valid email address. After verifying your email, you’ll be prompted to create a secure four-digit PIN. This PIN acts as your personal login key and provides added protection when accessing sensitive settings.
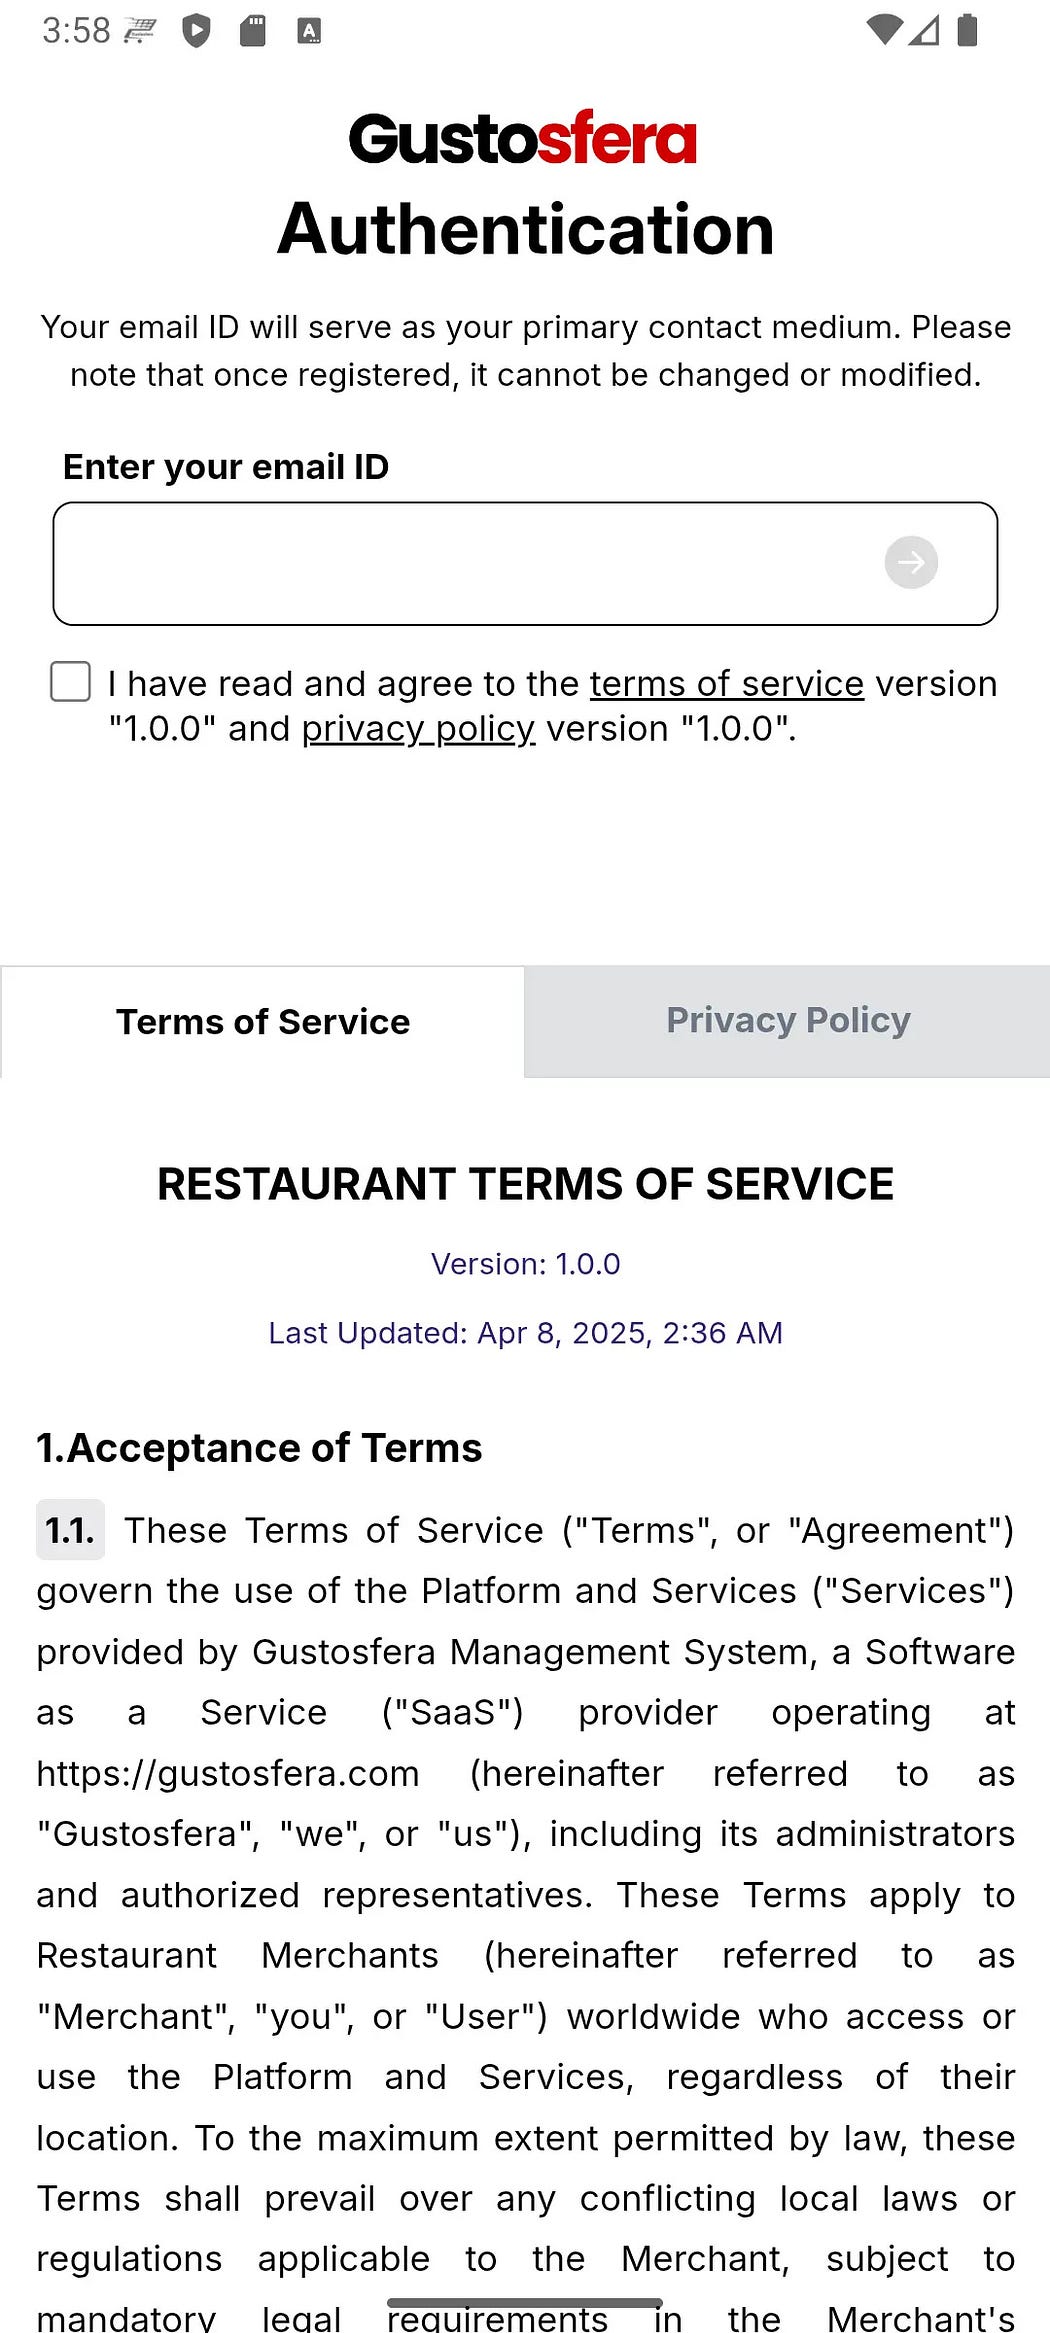
Once logged in, you’ll have access to a powerful dashboard designed for restaurant operations — everything from business settings to menu configuration is available right away.
Step 2: Choose Your Subdomain
Your digital identity begins with choosing a subdomain. Gustosfera offers flexible and customizable URL structures that help brand your restaurant professionally. Whether you’re a family-owned café or a large delivery-based kitchen, a subdomain like yourbrand.guskart.com or yourbrand.guscart.com sets the tone for your online presence. You can also connect your own custom domain — all at no additional cost.
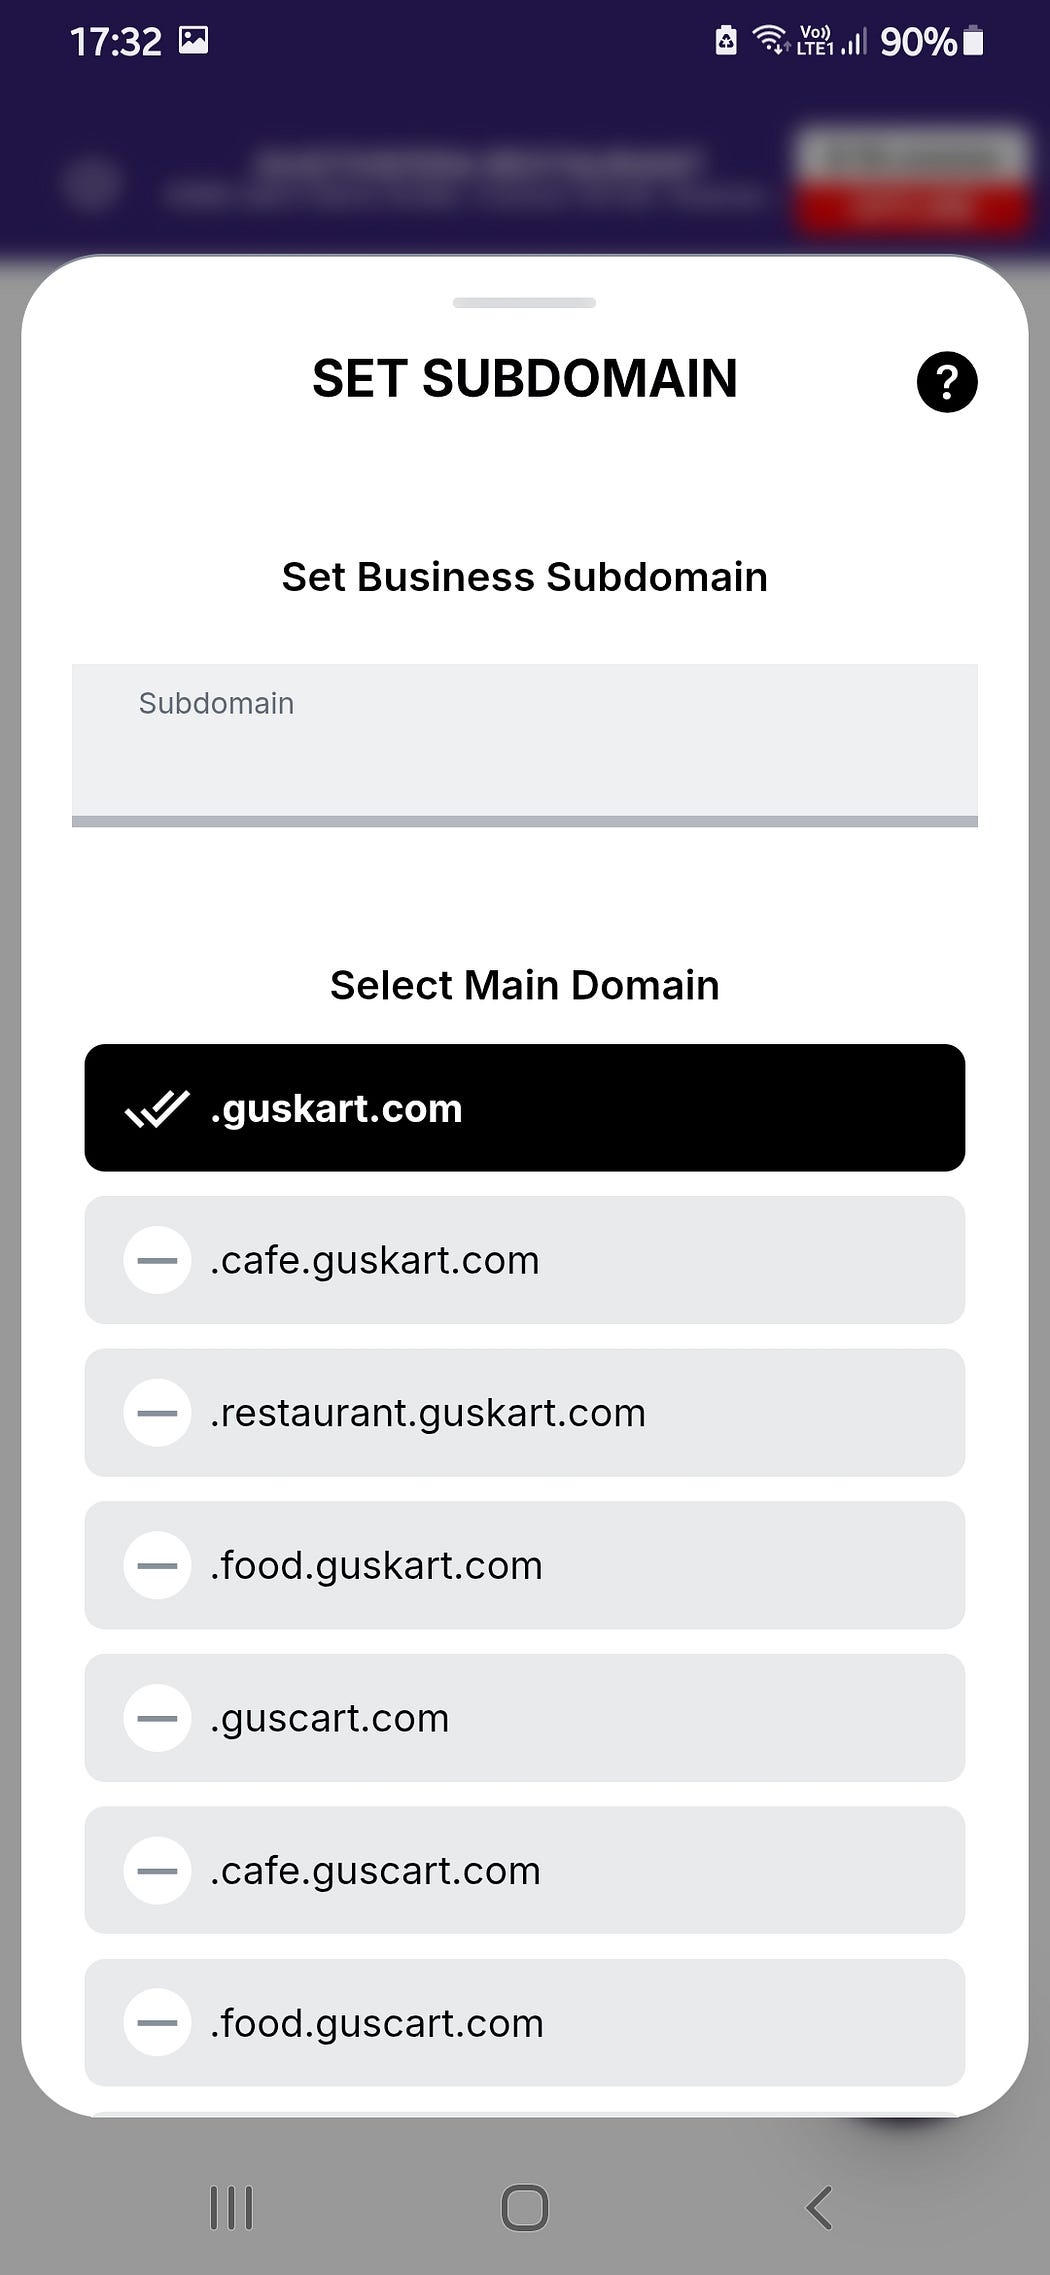
After you’ve selected your subdomain, you’re instantly redirected to your control panel. Here, all the tools you need to personalize and grow your online restaurant await.
To make the onboarding experience easier, Gustosfera credits your account wallet with an initial reward. This reward is delivered in three phases, helping you explore the platform:
- $10 credited immediately
- $10 credited after 48 hours
- $5 credited after one week
Step 3: Configure Business Settings
From your dashboard, click on the main navigation menu (indicated by the “G” icon). Head to Settings > Business Settings. Here, you’ll input critical details like:
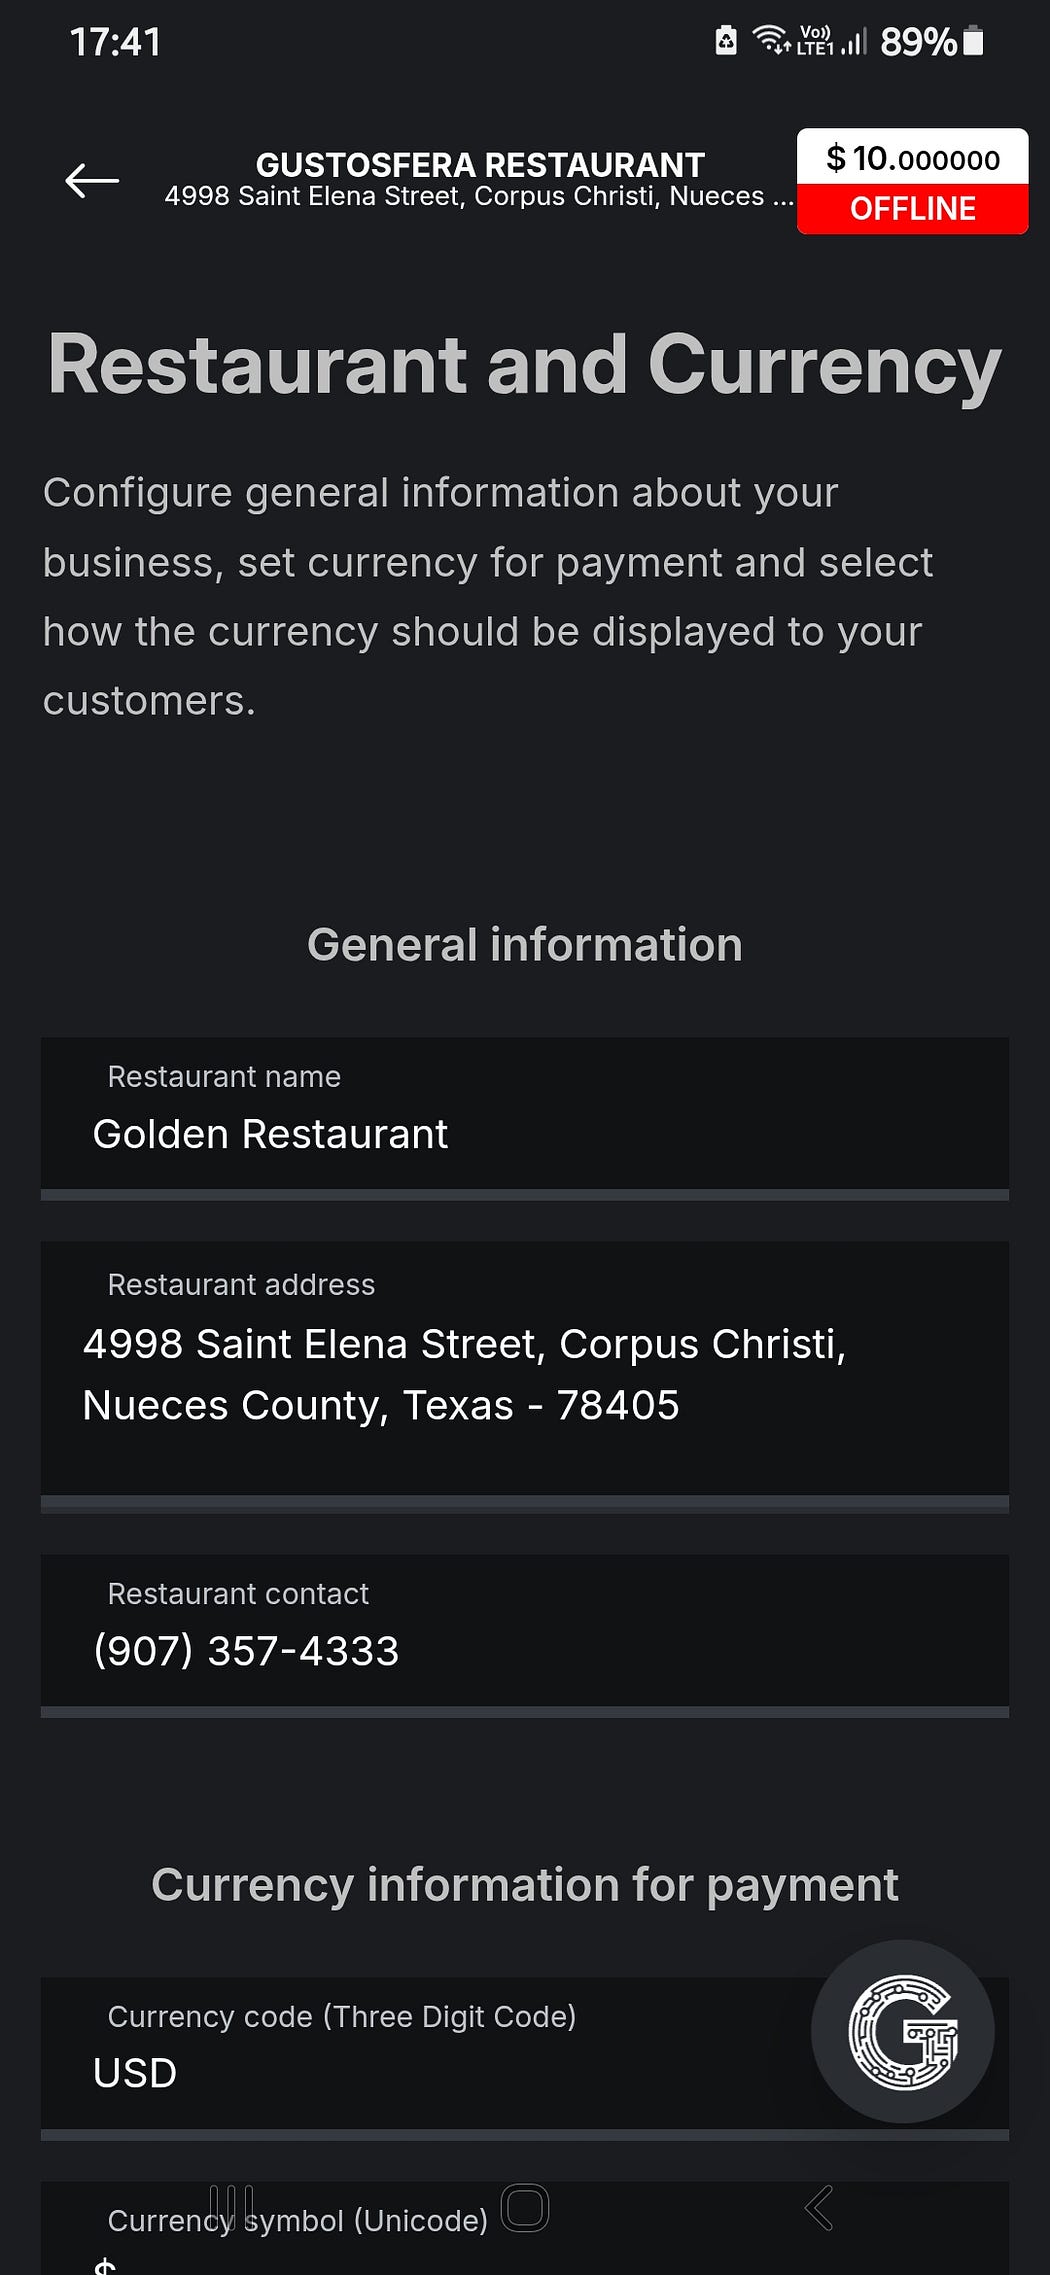
- Restaurant name
- Address
- Contact information
- Currency preferences
These values are reflected across your website and mobile app and ensure consistency across your digital ecosystem.
Occasionally, you may be prompted to re-enter your 4-digit PIN to access these secure settings.
Step 4: Customize the Look and Feel
Next, make your restaurant stand out with customized visuals. Within Website Details, you can:
- Upload your restaurant’s logo
- Set a banner image or promotional header
- Choose a website and app color theme
- Select font styles and sizes to match your branding
Then, under Social Media Link Settings, connect your accounts on Facebook, Instagram, WhatsApp, and other platforms. These integrations help you attract and retain more customers through cross-platform engagement.
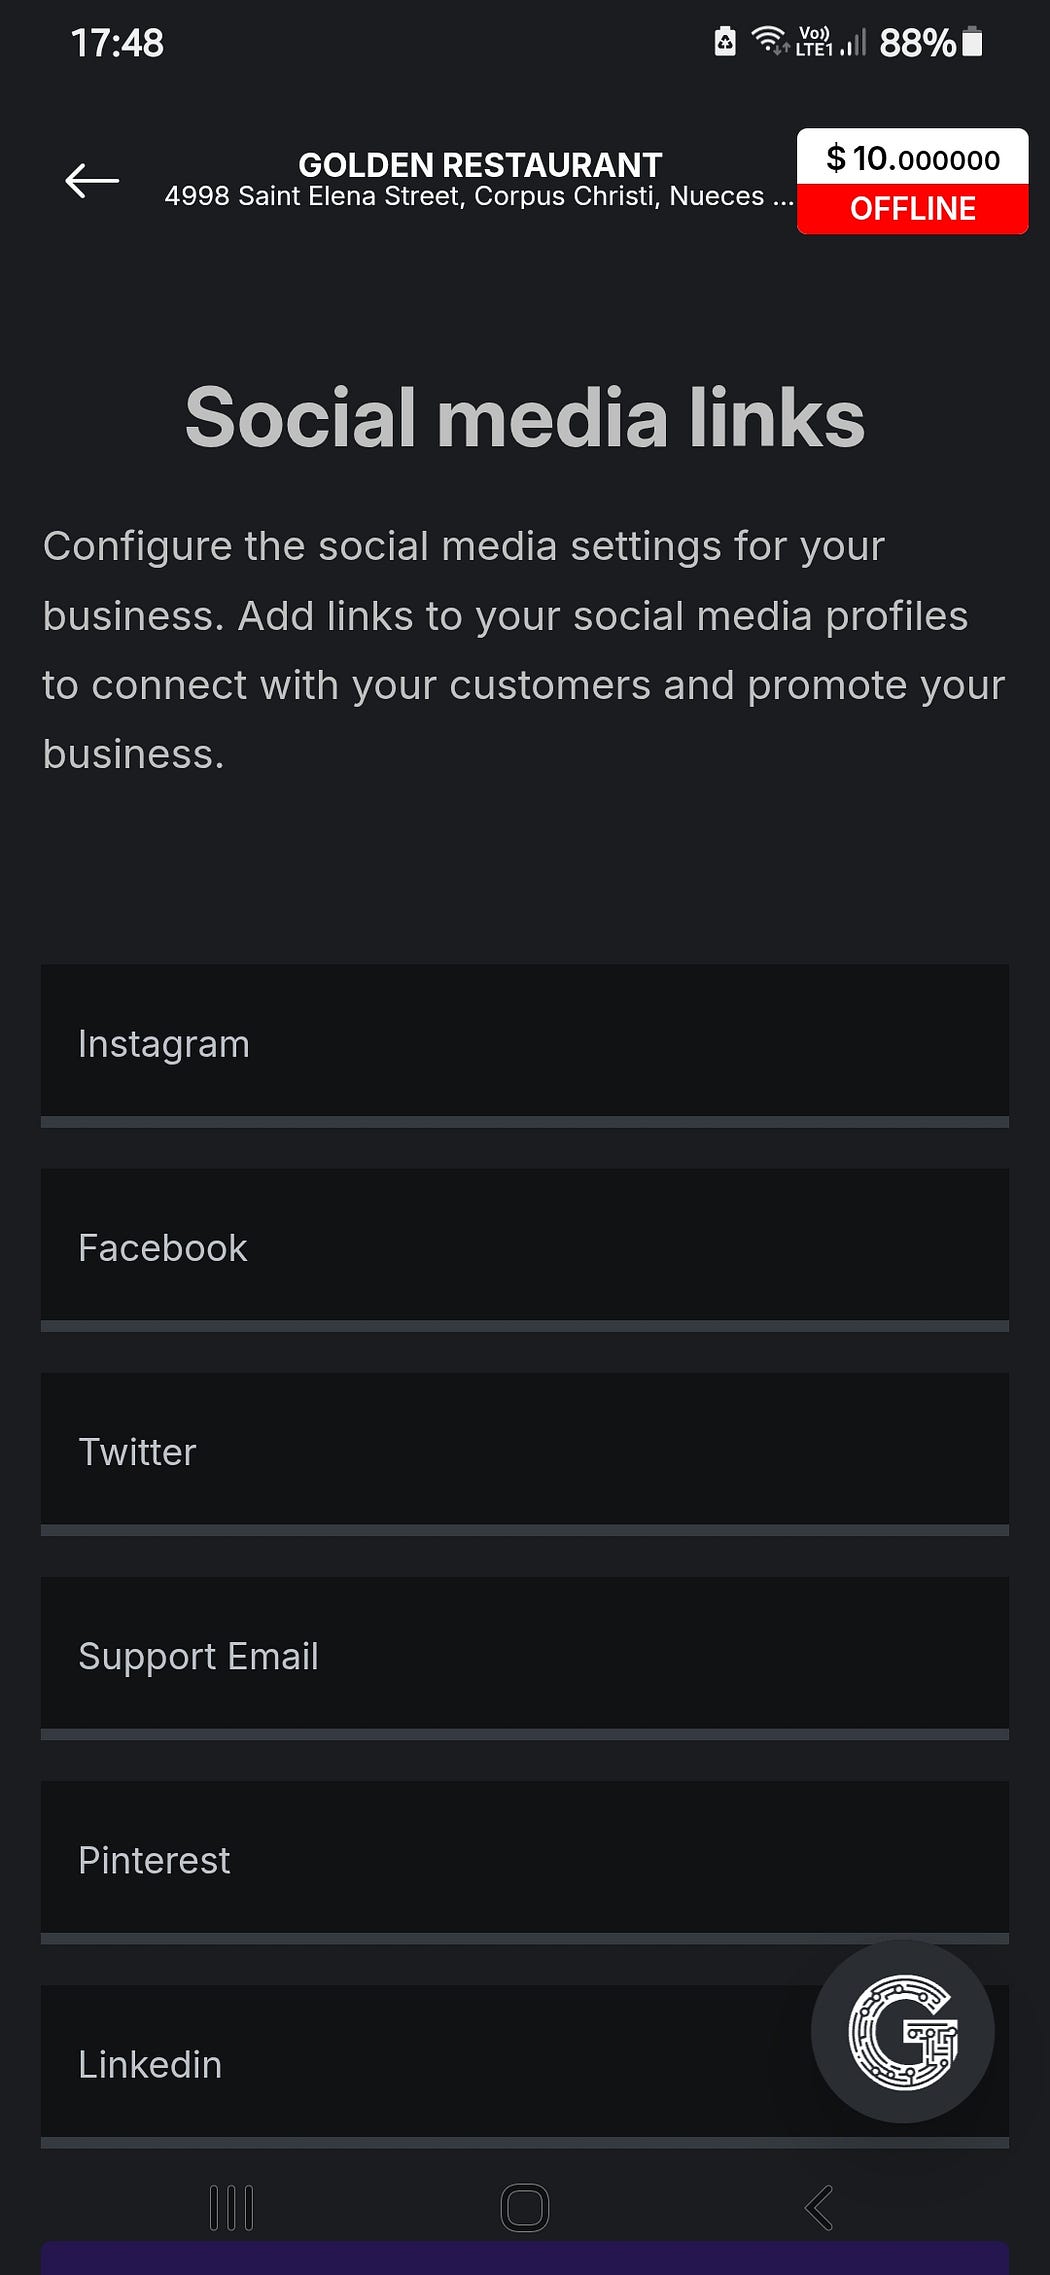
Once your customizations are done, it’s important to sync your website and app so that all changes reflect live:
- Click Website Synchronization
- Click App Synchronization
Please allow 10–15 minutes for changes to appear across both platforms.
Step 5: Launch Your Branded Android App
With your branding in place, it’s time to activate your mobile app. Under Android App Settings, initiate the launch of your restaurant’s branded Android application.
This gives your customers the power to explore your menu, place orders, track delivery, and enjoy an app experience tailored to your brand.
Step 6: Preview Your Website
Before promoting your new digital presence, view your live site to ensure everything appears as expected. Head to Settings > Website Details > Restaurant Web Link to preview how your website looks to customers.
This is your opportunity to refine visuals, adjust spacing, or enhance user navigation before going public.
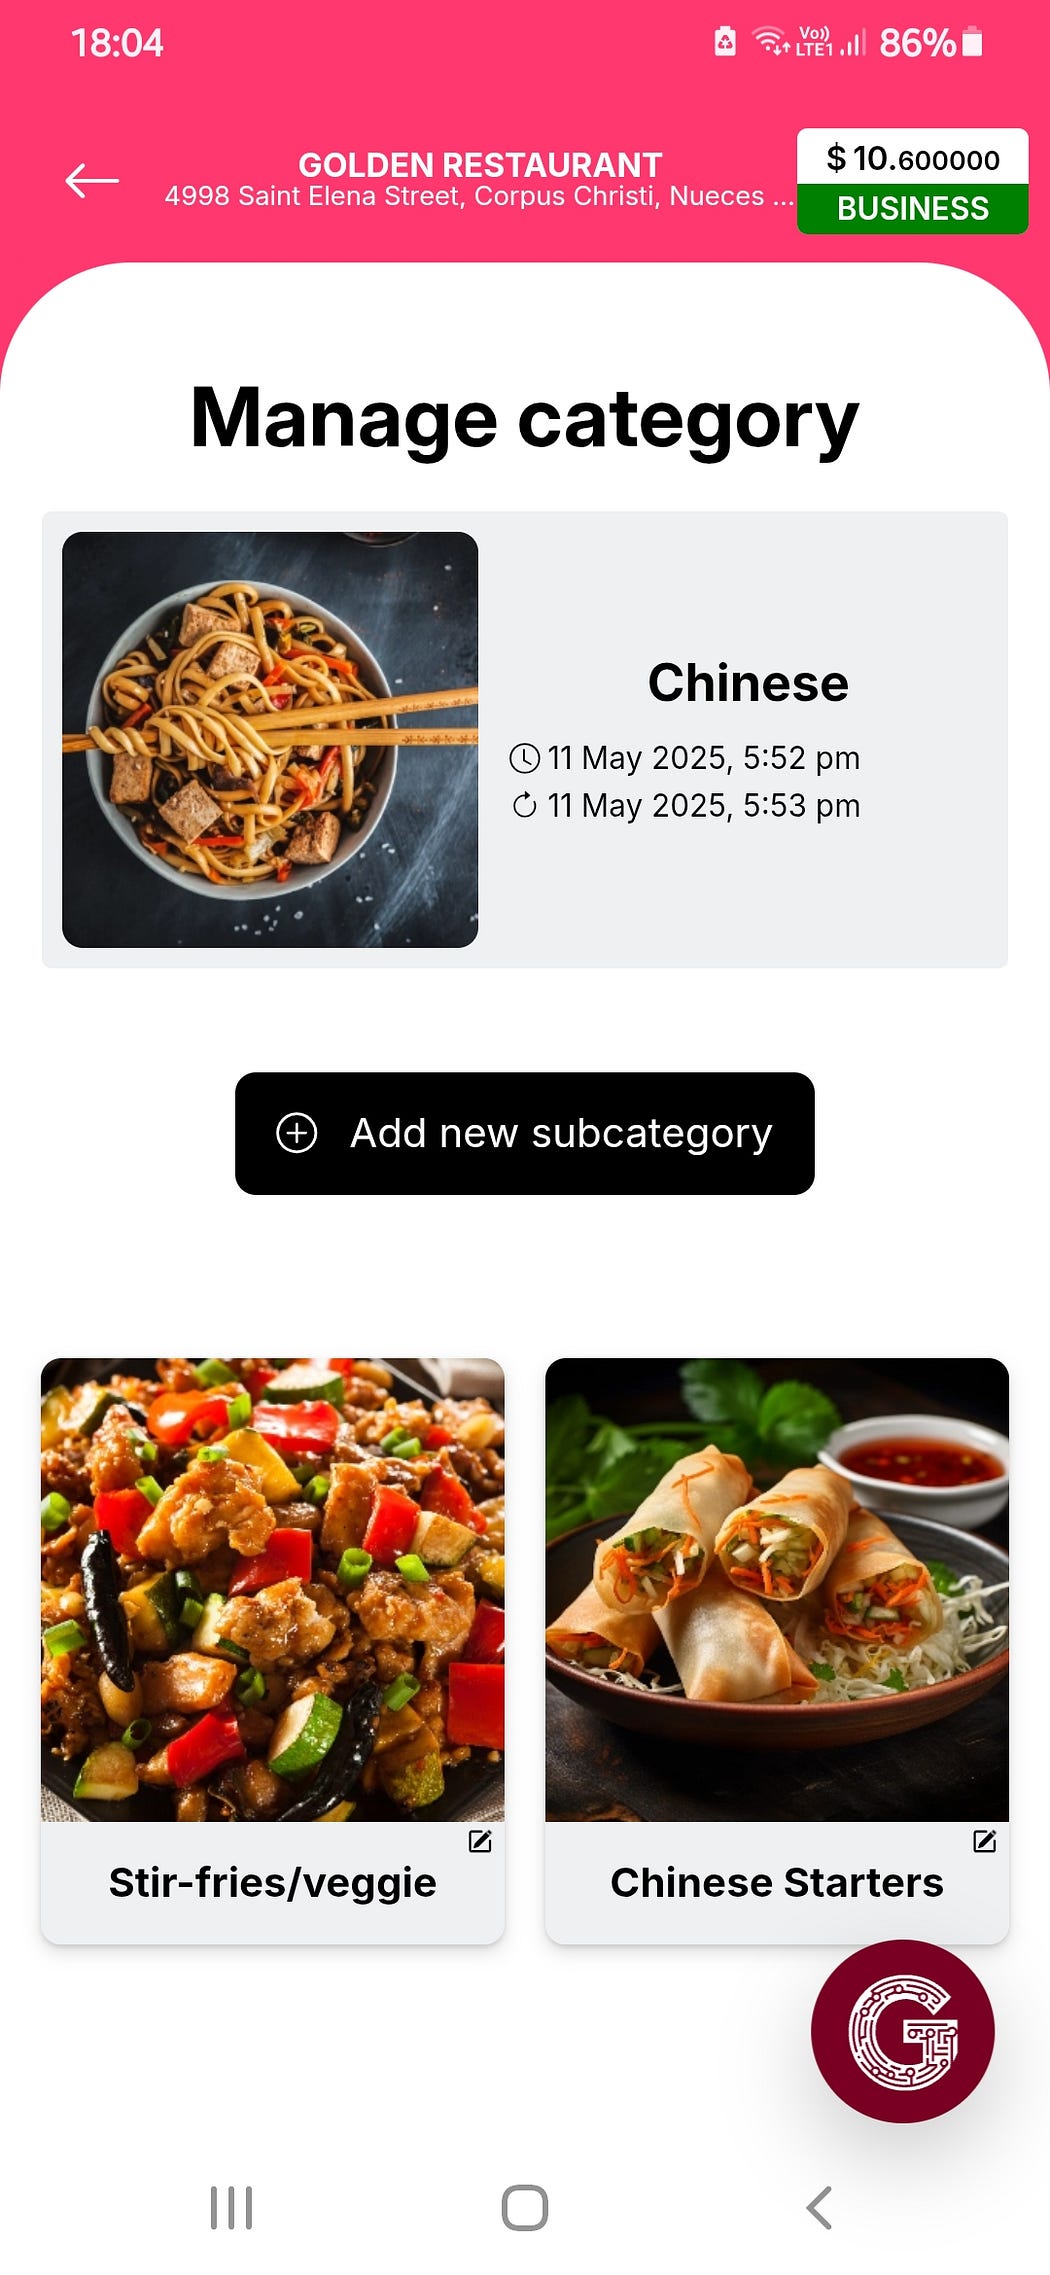
Step 7: Add Categories and Subcategories
Organize your menu with categories such as:
- Starters
- Indian Cuisine
- Continental
- Desserts
Each category can be paired with a representative image for better visual appeal.
Use the top-right icon on each category to add subcategories. For example:
- Under Indian Cuisine: Curries, Rice, Breads
- Under Starters: Veg, Non-Veg, Platters
This structure enhances the browsing experience and simplifies order placement for your customers.
Step 8: Upload Menu Items
To begin adding dishes to your digital menu, select Menu > Add New Product. Here, you can fill in details such as:
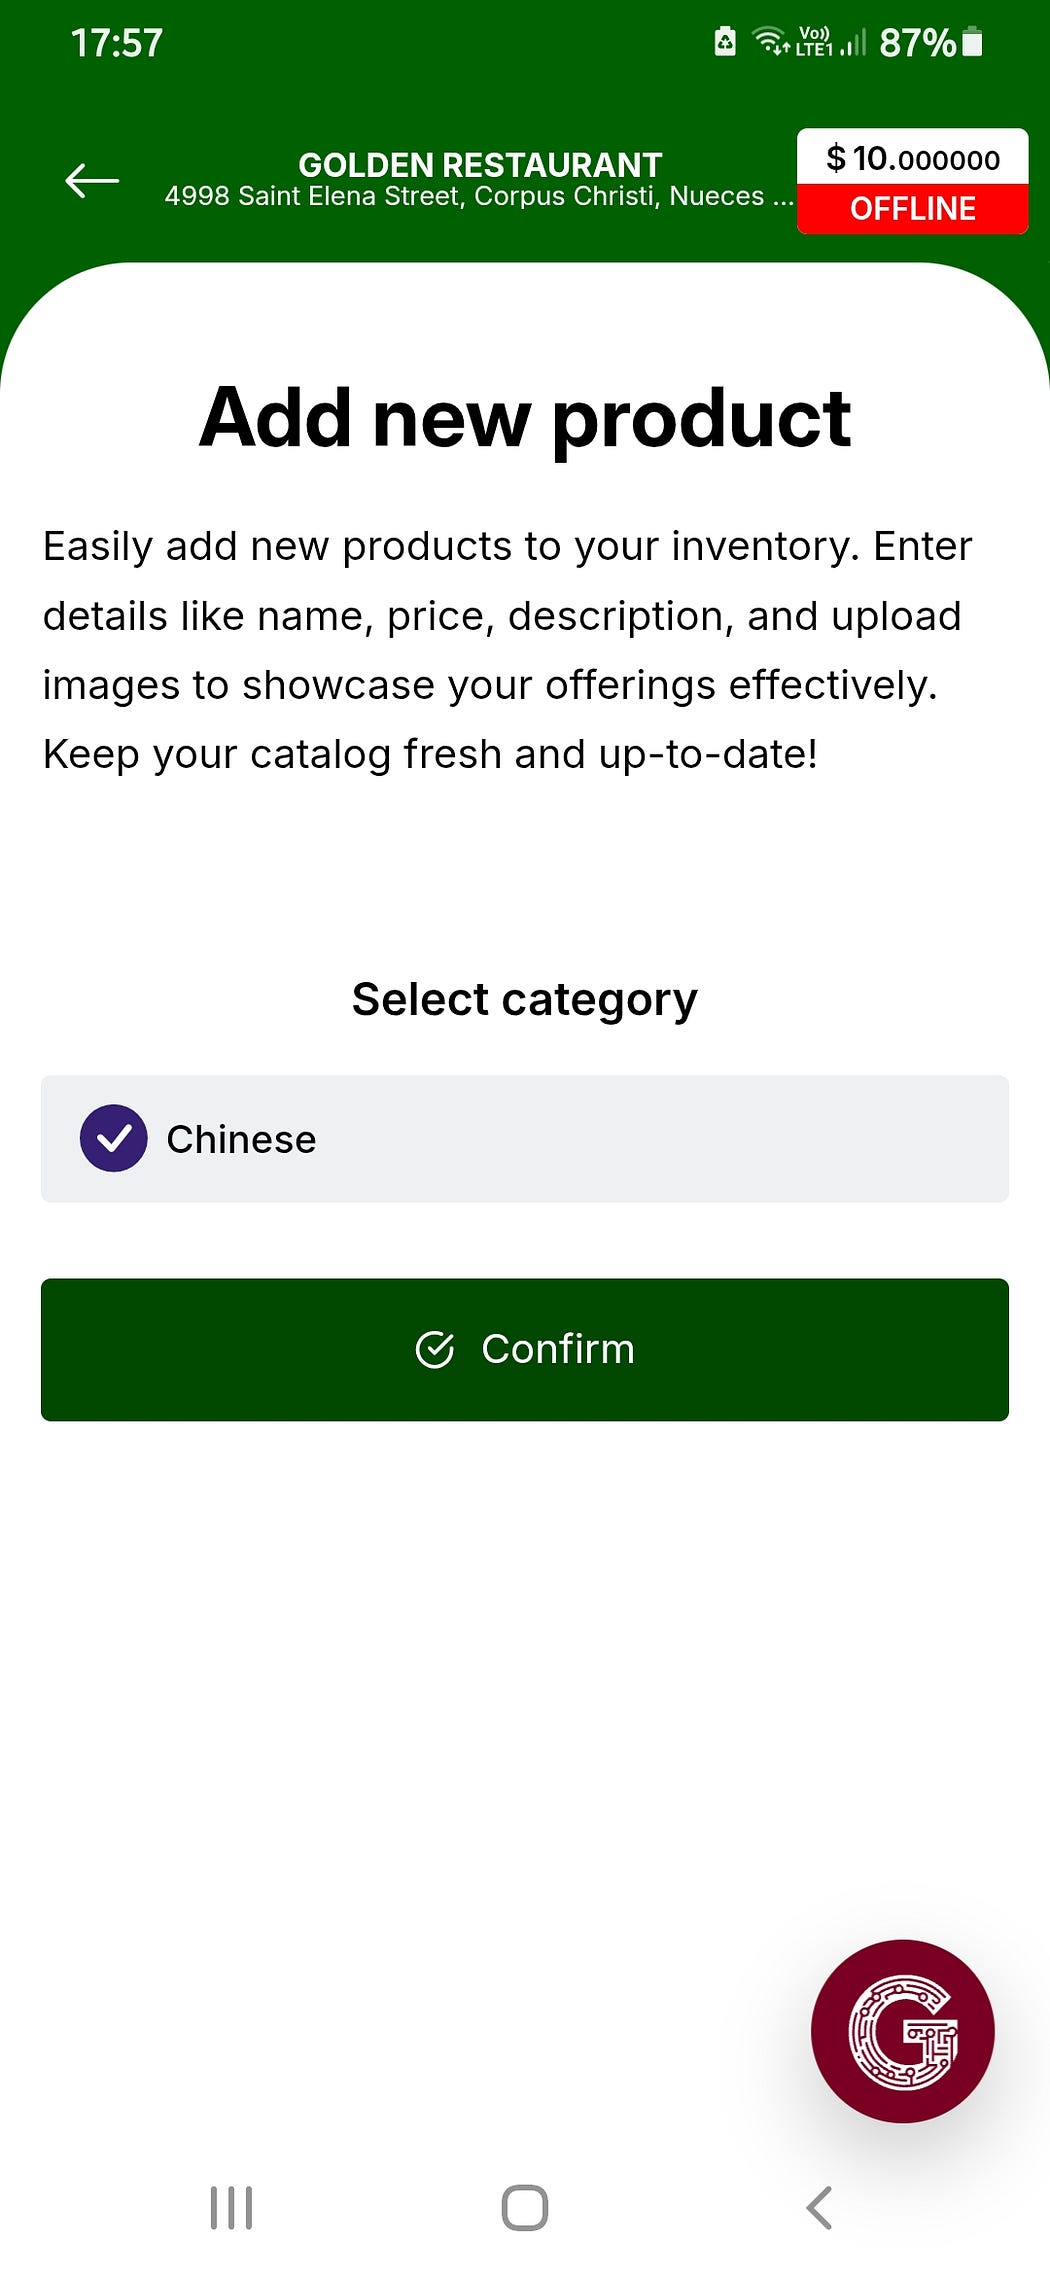
- Dish/Product Name
- Description
- Category & Subcategory
- Pricing
- Availability status
- Tax and minimum order quantity
- SEO metadata (optional)
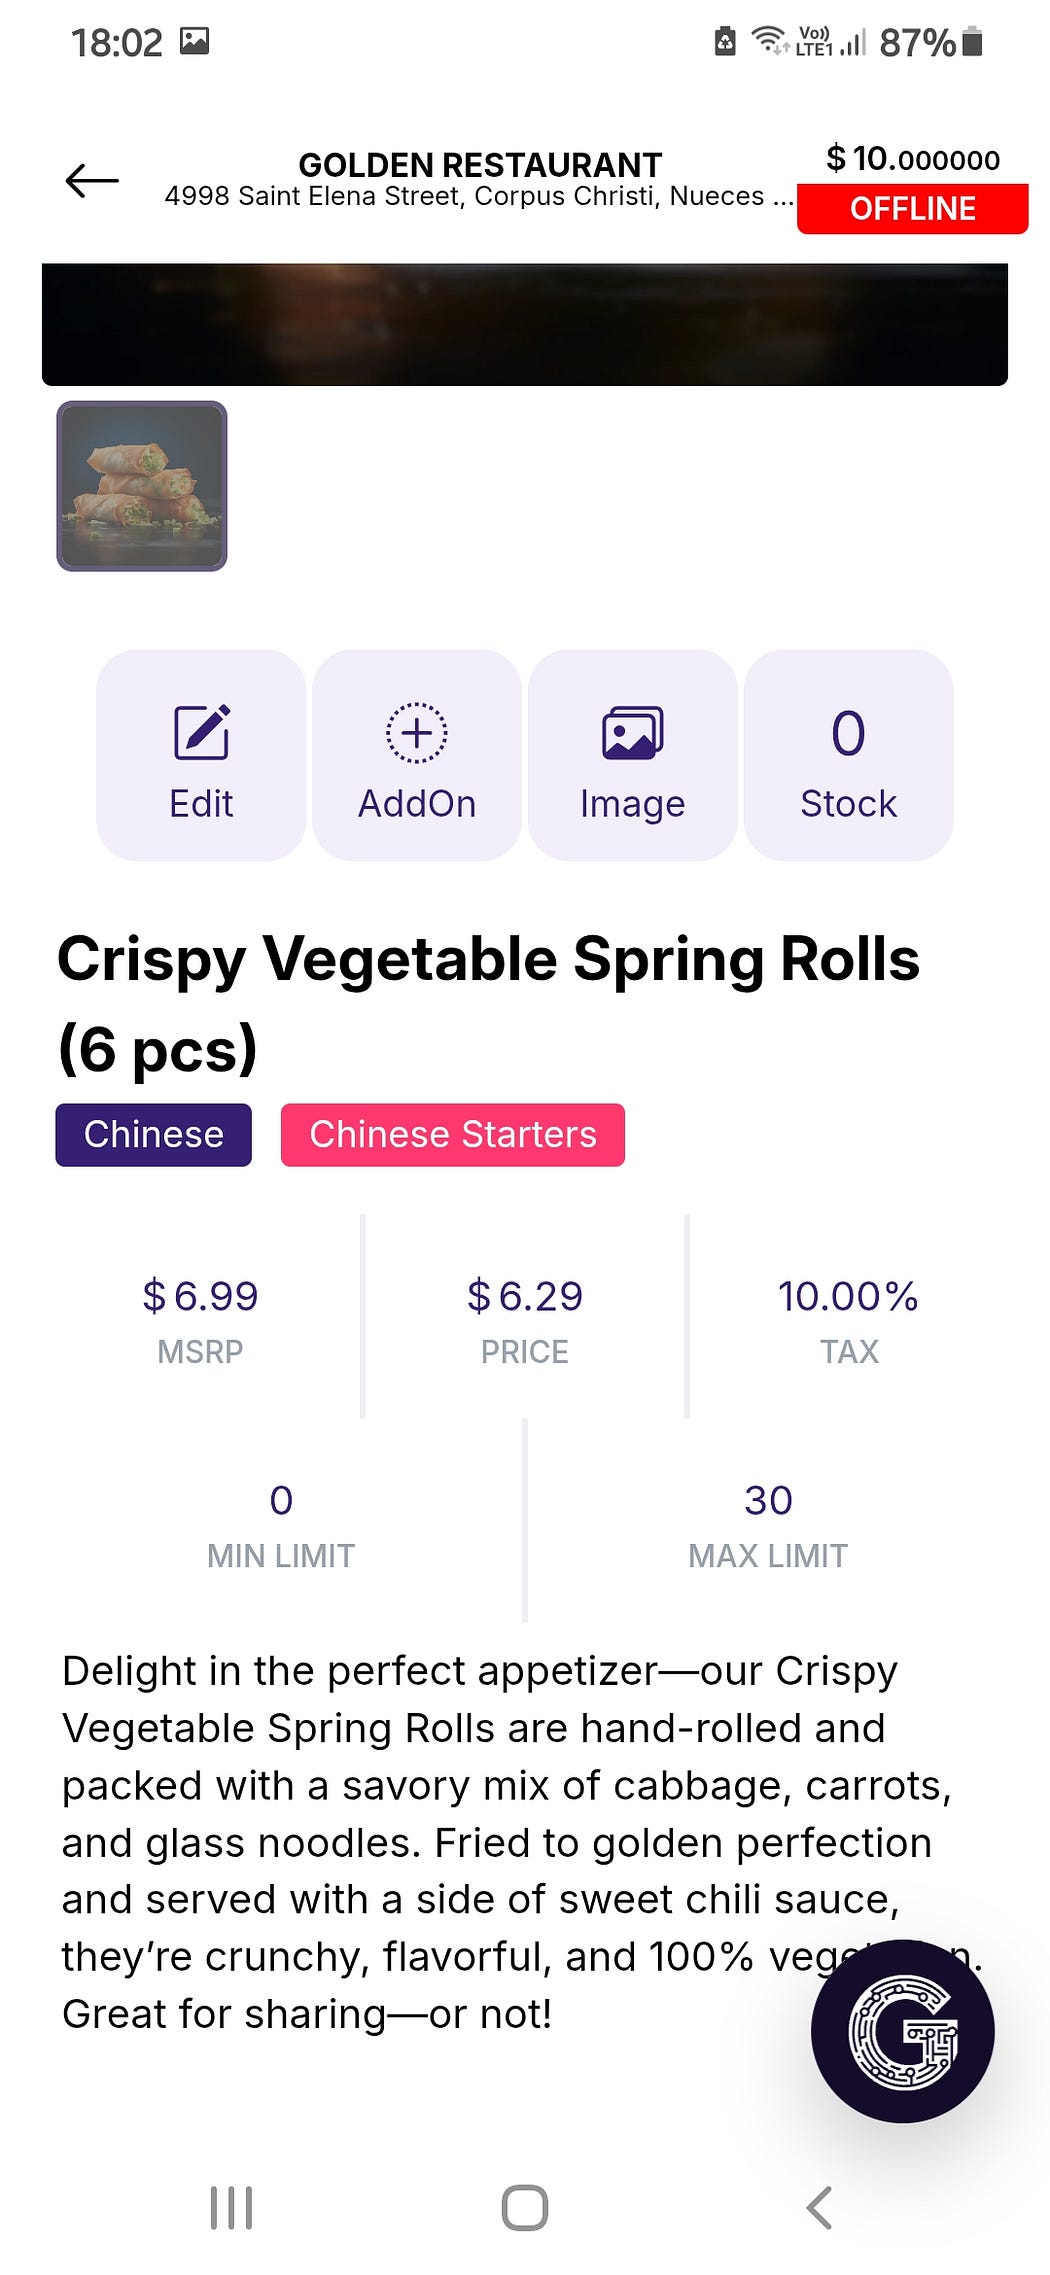
After submitting the product form, you’ll be redirected to the Manage Product section, where you can upload an attractive image of your dish. High-quality visuals play a major role in influencing purchase decisions.
Step 9: Sync Final Updates
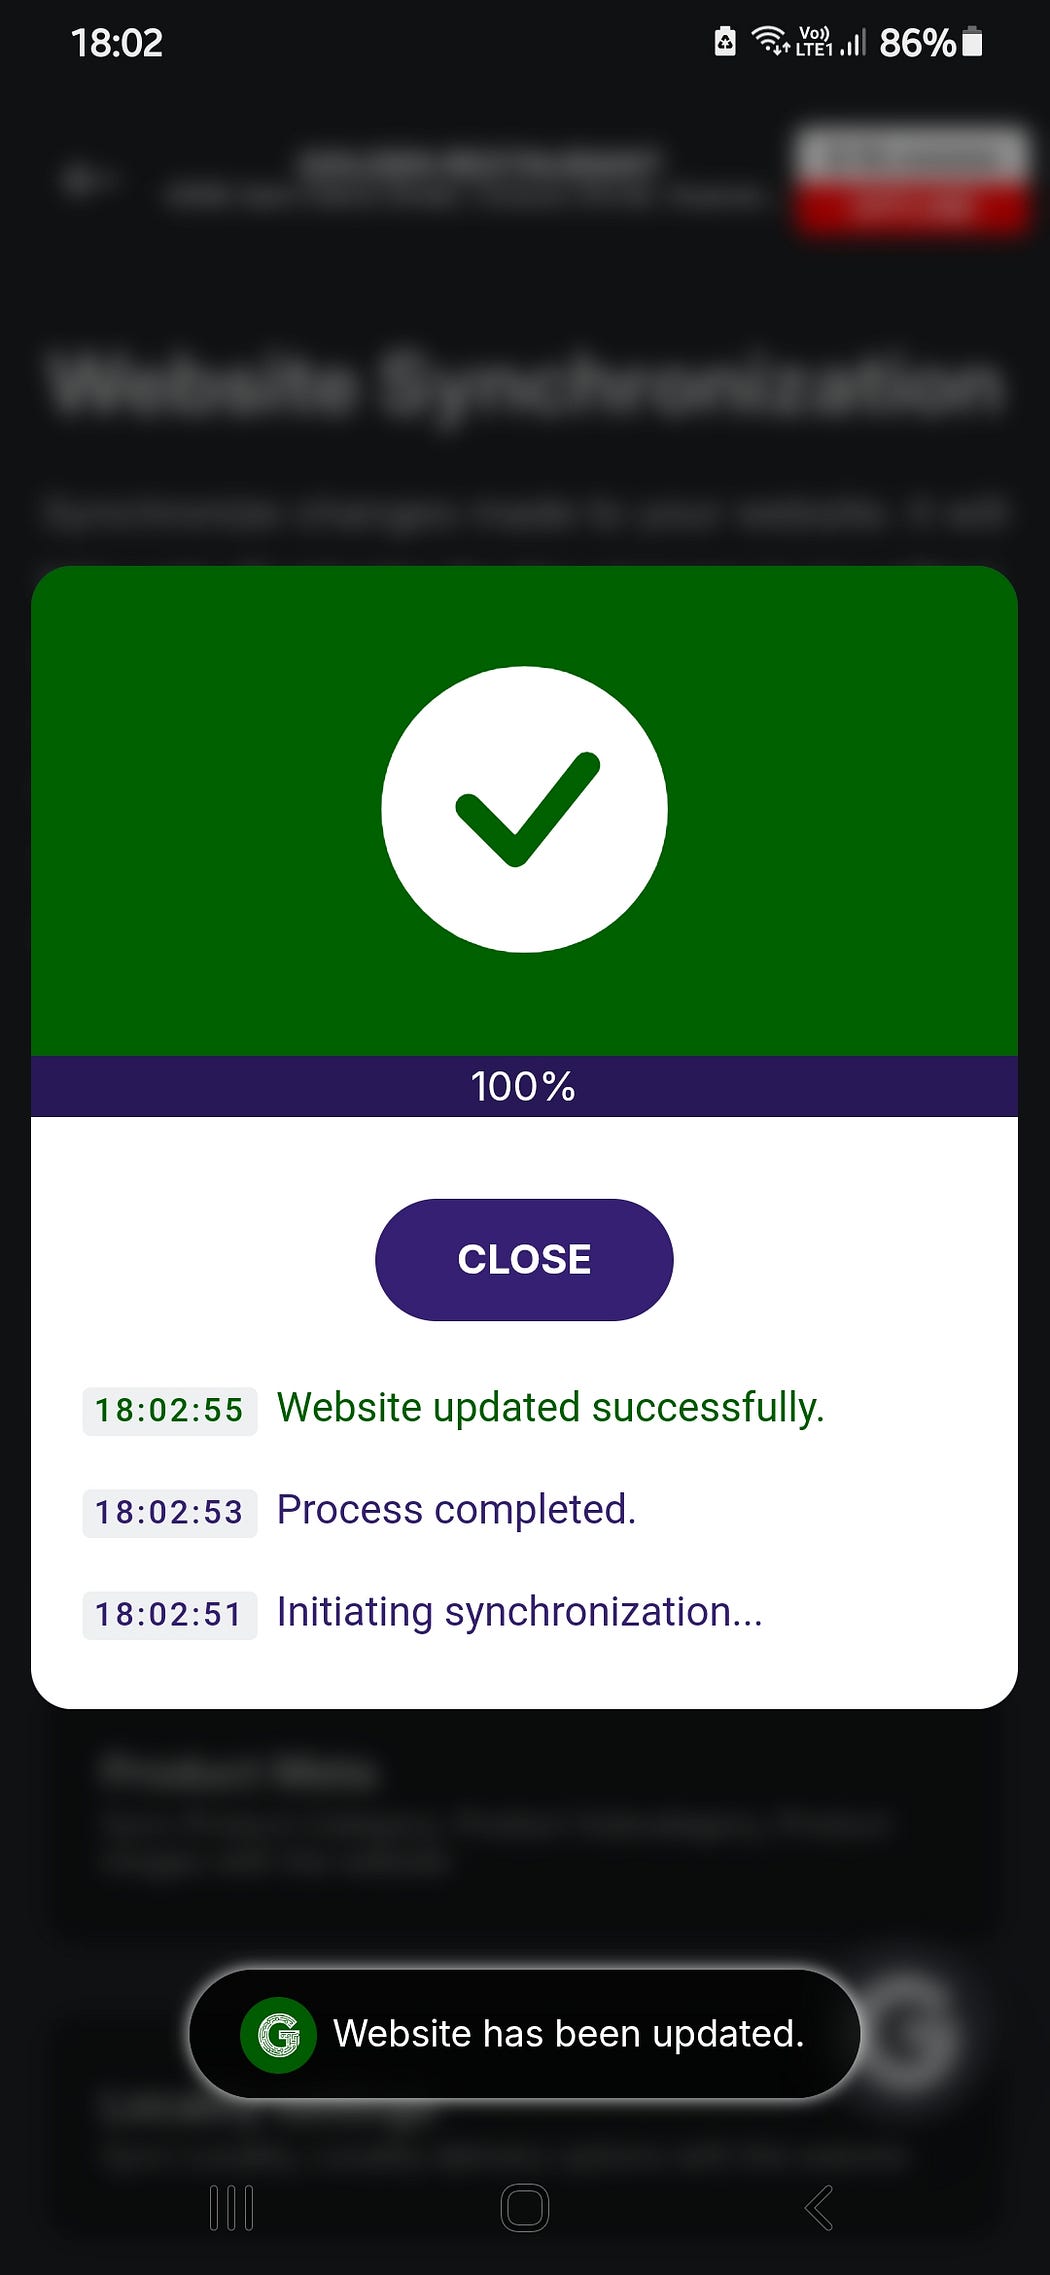
As you complete all configurations, remember to synchronize your app and website one final time. Go to Settings, then:
- Click Website Synchronization
- Click App Synchronization
Waiting 10–15 minutes ensures all changes — design updates, product additions, business info — are live and accurate.
Tip: Perform synchronization after a complete round of edits for optimal performance and fewer errors.
Step 10: Ready to Serve
You’re now fully equipped to operate your restaurant digitally. From this point forward, you can:
- Accept and manage online orders
- Monitor analytics from the admin dashboard
- Add or update menu items
- Offer digital deals and discounts
- Improve customer engagement with app notifications
Your restaurant is live, modernized, and built to scale in today’s tech-savvy dining environment.
Need More Help?
For a complete, in-depth walkthrough of every Gustosfera feature and advanced configurations, visit:
???? https://doc.gustosfera.com
Final Thoughts
Gustosfera isn’t just a tool — it’s a complete ecosystem that empowers restaurant owners to launch and grow their digital brand independently. With a few hours of setup, you’re prepared to offer an experience that rivals the best in the industry — directly from your smartphone.
Whether you’re managing a food truck, quick service joint, or a fine dining restaurant, Gustosfera gives you the tools to thrive in the online food commerce space.